Create Your First Community
Create your first community from the dashboard and open it right away.
6 min read
Updated Mar 4, 2026
Before You Start
- Sign in to your Jatra account.
- Keep a community name and a short one-line description ready.
- Choose a URL name using lowercase letters, numbers, and hyphens.
- Pick the timezone you want to use for your community.
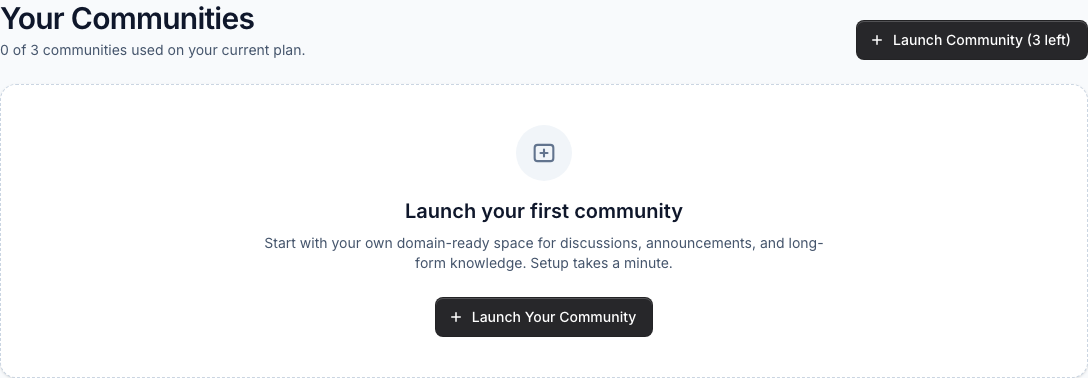
Step 1: Open the Launch Community Flow
- Open your Dashboard.
- Click `Launch Community` from the center card or the top-right button.
- You will be taken to the community setup form.
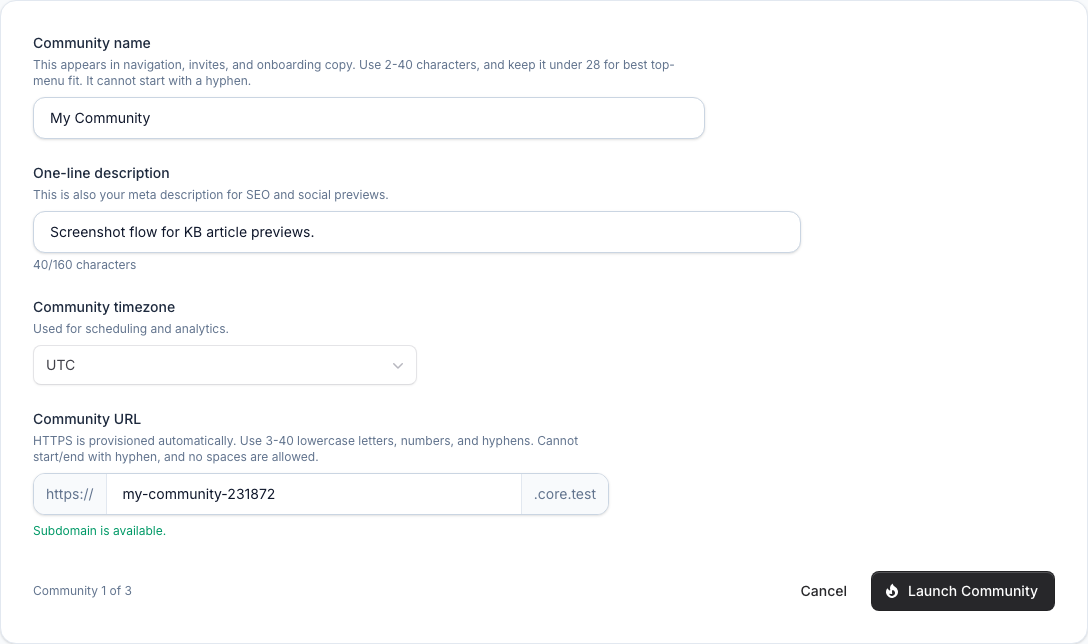
Step 2: Fill Required Fields
- Enter your community name and one-line description.
- Choose your timezone.
- Type your community URL name and wait for the available message.
- Click `Launch Community`.
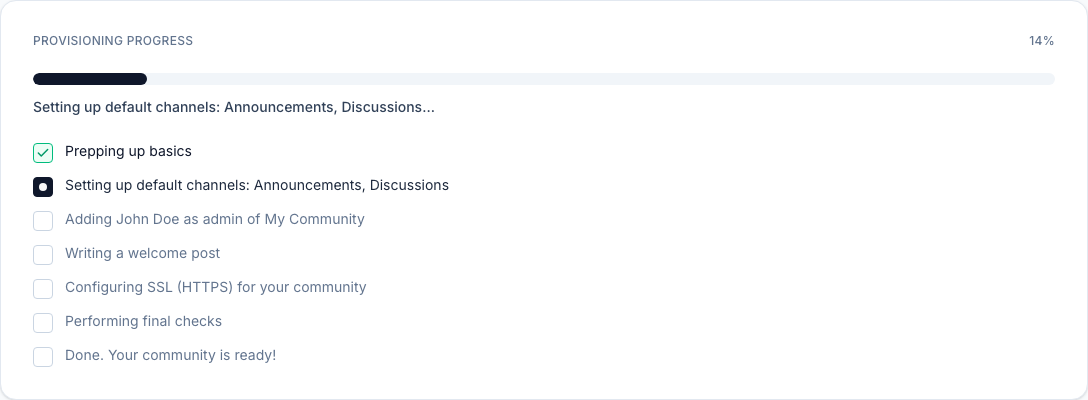
Step 3: Submit and Monitor Provisioning
- Stay on the setup page after you click launch.
- Watch the progress bar and checklist update automatically.
- When setup is done, you will return to the Dashboard.
Step 4: Verify the Community Card and Open It
- Find your new community card on the Dashboard.
- Confirm it shows a green `Live` status.
- Click `Visit Community` to open it.

Troubleshooting
- If your URL name is unavailable, try a different name.
- If the launch button is not active, check that all required fields are filled.
- If setup feels slow, wait a little and refresh the Dashboard.
- If your new community still does not appear, contact support.
Expected Result
Your community appears on the Dashboard as `Live`, and you can open it using `Visit Community`.