Set Channel Privacy and Posting Permissions
Control visibility and posting rights for open, restricted, and private channels.
4 min read
Updated Mar 4, 2026
Before You Start
- Create the channel first.
- Sign in as an owner or admin.
- Know whether this channel should be open to everyone or limited to selected members.
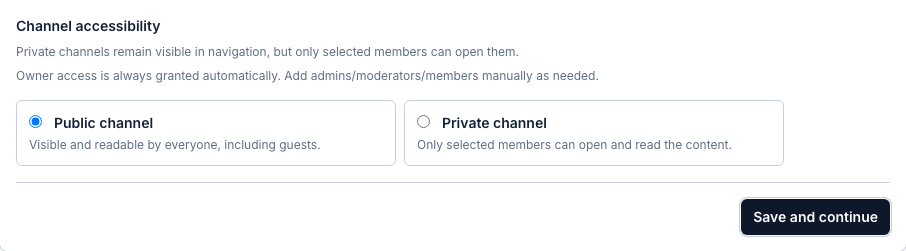
Step 1: Set Channel Privacy
- Open `Settings` -> `Channels`.
- Open your channel and go to the `Privacy` tab.
- Choose `Public channel` if everyone should read it.
- Choose `Private channel` if only selected members should read it.
- For private channels, add members in the member picker.
- Click `Save and continue`.
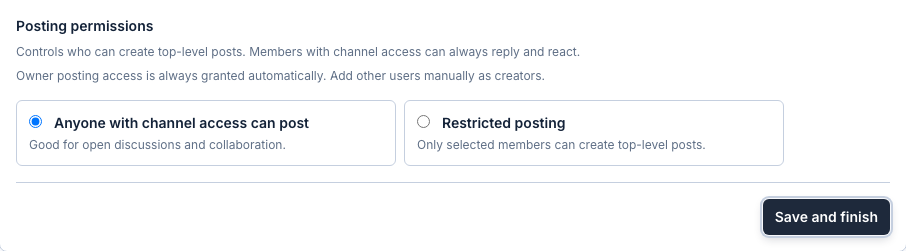
Step 2: Set Who Can Create Posts
- Open the `Permissions` tab.
- Choose `Anyone with channel access can post` for open posting.
- Choose `Restricted posting` if only selected people should create posts.
- If restricted, add the allowed creators.
- Click `Save and finish`.
Simple Recommendations
- Use Public + open posting for general discussions.
- Use Public + restricted posting for announcement channels.
- Use Private + restricted posting for leadership or internal planning channels.
Expected Result
Your channel now has the exact reading and posting rules you selected.