Schedule Posts (Roles and Timezone)
Schedule future content with role-gated controls and timezone-aware validation.
4 min read
Updated Mar 4, 2026
Before You Start
- Open a post composer (for example Article).
- Add your title and content first.
- Make sure you choose a future date/time.
Step 1: Turn On Scheduling
- In the composer, find `Schedule publish date/time`.
- Turn the schedule switch on.
- Choose a future date and time.
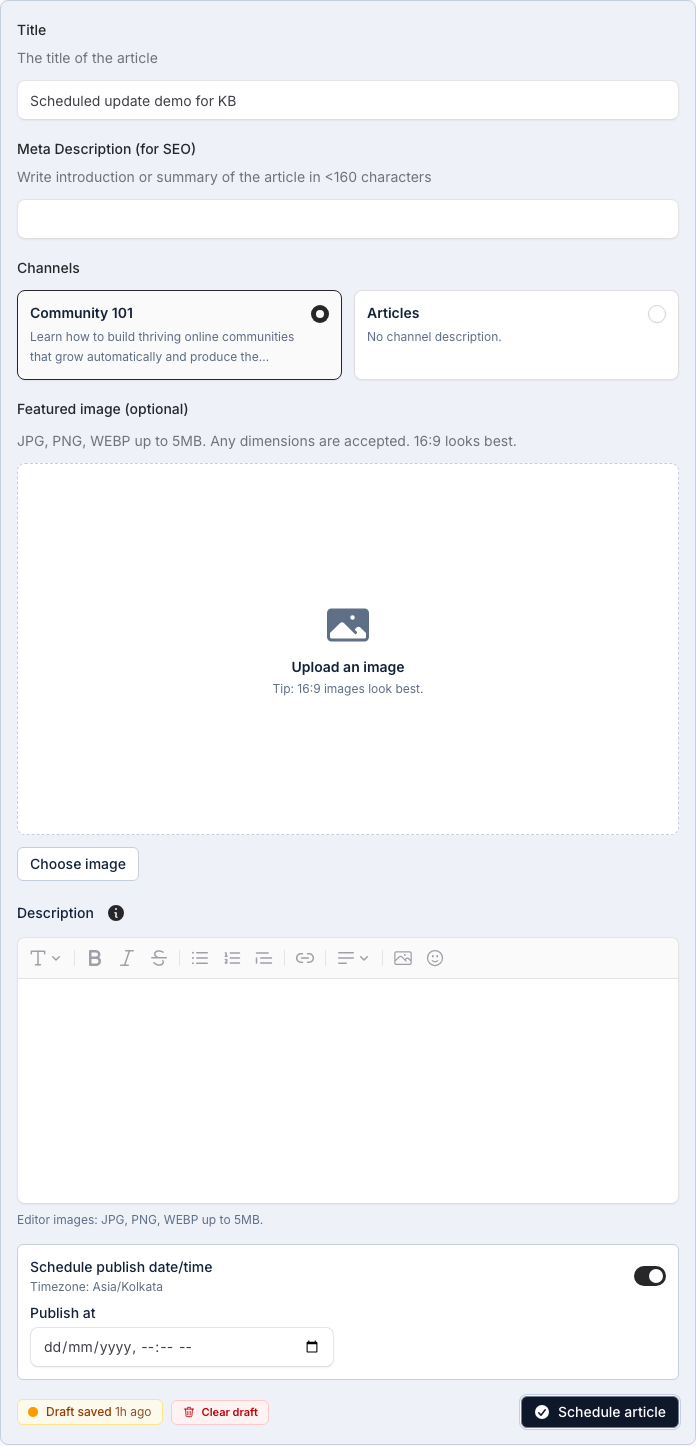
Step 2: Confirm Community Timezone
- Check the timezone label shown in the schedule panel.
- Set your publish time using that timezone.
- Review the `Publish at` preview before saving.
Step 3: Save the Scheduled Post
- Click `Schedule` to save.
- Your post will publish automatically at the selected time.
Troubleshooting
- Date/time rejected: select a future date/time.
- Schedule option missing: your role may not have scheduling access.
- Wrong publish time: recheck the timezone label and update the schedule.
Expected Result
Your post is saved and will publish automatically at the chosen future time.